Sow ‘n Sow
Embedded and inspired by nature, Sow ’n Sow believes in purposeful gifting that doesn’t cost the planet.
Sow ‘n Sow blossomed from a tiny seed of an idea in 2010 when Michelle Brady, the founder, combined her love of gardening and eye for design. Home is nestled among the hills of Maleny on the Sunshine Coast, where Michelle relishes getting her hands dirty in the soil.
Their products are uniquely crafted to help you grow your own way and feature designs created by talented Australian artists made entirely from 100% recycled materials, proudly manufactured in Australia.
They take pride in their intentional approach to sustainability, ensuring these amazing gifts are loved for months as they bloom and grow, with packaging that is fully compostable, completing its natural cycle back to the earth.
Sow ‘n Sow’s Seeds
Whether it’s for the devoted plant parent or the friend in need of a little encouragement in caring for their green friends, these beautiful gifts will awaken the inner gardener in everyone.
Their hope is that these gifts inspire others to embrace nature and play in the dirt, for life is too short to always have clean fingernails.
Michelle collaborates closely with the talented designer and illustrator Daniella Germain, whose stunning artwork graces most of their products. Their dedicated team carefully hand-assembles each product.
Sow ‘n Sow’s seeds are non-hybrid, open-pollinated, non-GMO varieties sourced from reputable suppliers both within Australia and abroad. Each Gift of Seeds contains at least 25 seeds, or similar to what you would expect to find in a nursery-bought standard seed packet. Seeds should be stored in a cool, dry place for best long-term viability. A shelf life of approximately 2 years is recommended for the Gifts of Seeds, to ensure good germination rates.
We are proud to be able to offer this beautiful gift in our shop.

How to sow seeds
Toggle the seed names to learn more about each of the Gift of Seeds varieties.
Read on below for general seed-sowing instructions to ensure success.
Cosmos
Variety: Cosmos bipinnatus
Cosmos are the seeds for those who think they can’t grow anything. They don’t mind poor soil, thrive in hot dry conditions and are happy growing in pots or direct in the garden. These bright, delicate, daisy-like flowers are almost fluro in colour and will attract butterflies, bees and other beneficial insects to the garden.
Sow seed in spring & summer at a depth of around 5mm and keep moist until the seed has germinated. While they don’t need a lot of water once established, watering regularly ensures an abundant supply of blooms.
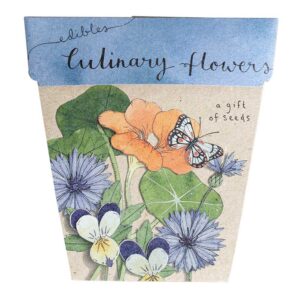
Culinary Flowers: Nasturtium, Viola and Cornflower
The beautiful Culinary Flowers Mix contains Nasturtium, Viola and Cornflower seeds. Each of these seeds will grow into gorgeous edible flowers that will also add bright pops of colour to your garden.
Sow seeds in spring and summer in full sun. Bury individual seeds as deep as their height and ensure that soil is kept moist. These flowers are happy in gardens, pots and even indoors.
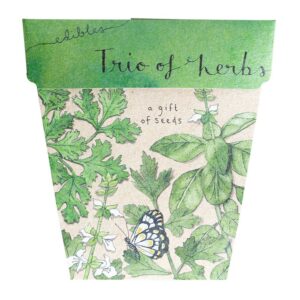
Trio of herbs: Parsley, Coriander and Basil
Each of the herbs in this mixed pack is easy to grow, well-known and useful in the kitchen. All three herbs grow well in both pots and garden beds.
Sow seed in a sunny position with good soil from spring to autumn. Basil will bloom from spring through to autumn, while parsley and coriander will bloom year-round if the seed is sown regularly.
Basil variety: Sweet Genovese, Ocimum basilicum
Parsley variety: Italian, Petroselinium hortense
Coriander variety: Fiesta Green, Coriandum sativum
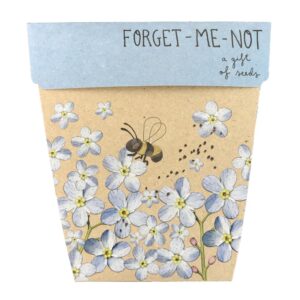
Forget-me-not
Variety: Forget-me-not, Myosotis
Forget-me-nots are a delightful cottage garden plant that produces masses of beautiful sky-blue flowers in spring. They are easy to grow, require minimal care and will grow well in both sunny and shady areas. Sow in good quality, moist soil.
Forget-me-nots are a good self-seeder and will spread. To encourage reseeding, leave the spent flowers on the plants after they’ve blossomed. To discourage spreading, pinch off the flower heads after they’ve faded. Forget-me-nots can be grown under trees, in rock gardens and in flower beds.
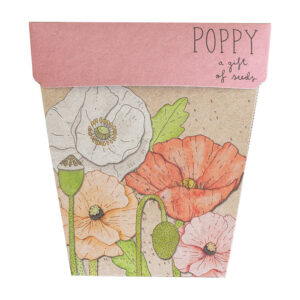
Poppy
Variety: Shirley, Papaver rhoeas
Poppies are beautiful flowers that are easy to grow from seed and should be sown in autumn and winter. Their delicate orange/ red flowers will blossom in late winter and spring.
The seeds should be scattered in a sunny spot and covered with only a very thin layer of soil as they need light to encourage germination.
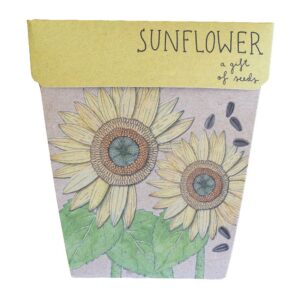
Sunflower
Variety: Helianthus annuus ‘Giant Single’
Sunflowers are very easy to grow and produce brilliant giant yellow flowers up to 180cm. Sow in spring or summer and all year round in warm areas. Sunflower seeds are best sown direct where they are to grow but they can be started in pots and transplanted when the plant produces its second set of leaves.
Ensure a warm, sunny position is chosen with good soil and give the seedling plenty of room to grow big and tall. If crowded or grown in pots the Sunflowers will produce a smaller flower and stem.
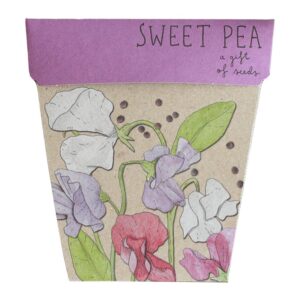
Sweet Peas
Variety: Knee-Hi Mix, Lathyrus odoratus
A card designed to wish a “Happy Birthday” to your own sweet pea. These stunning flowers also hold a lot of nostalgic meaning for many people. These seeds are best sown in autumn in a sunny position with good drainage. Sweet peas are happy in garden beds or grown in a pot. They benefit from some support so setting up a trellis and growing along a fence line or wall works well. Alternatively, you can let them fall down over the sides of a tall pot or hanging basket. In our experience, the seeds take a little over a week to germinate. Sweet peas flower in spring.
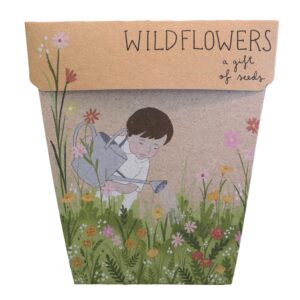
Wildflowers: Californian Poppy, Cosmos & Alyssum
Varieties: Eschscholzia californica, Cosmos sulphureus, Alyssum benthamii
In mild climates, seed can be sown in autumn for flowering in spring. Seeds can also be sown in spring and summer for blooming later in the season.
Scatter seeds in a sunny position free of weeds, cover with a thin layer of soil and keep moist until the seeds have germinated.
Once the seedlings have established, thin out to 15cm apart and water regularly to ensure abundant supply of blooms.


When starting seeds indoors, follow these easy steps:
- Find some trays or pots and fill them with a seed-raising mix
You could use a seed-raising tray, an old pot, or an egg carton. We use the fresh seed-raising mix to germinate our seeds as it is clean and weed-free and seedlings can easily rise up through the fine texture. - Place your seeds into the soil
Make sure that you only place the seeds approximately twice as deep as the seed is wide. For example, poppy seed is tiny and will only need to be sprinkled onto the surface. Compare this to a sunflower which is quite a large seed, which will need to be pushed down to about 1 cm deep. Our Gifts of Seeds indicate the sow depth on the inside of the package. - Spray the seeds with water from a spray bottle
Give the soil a good misting to ensure it is moist. Spray bottles are nice and gentle and will ensure the seed isn’t dislodged while watering. - Keep moist & provide sunlight
Whilst waiting for your seeds to germinate, make sure that the soil stays moist. If the top layer of soil is dry, give it a good spray. Ensure the tray is in a position to receive lots of sunlight. - Feed the seedlings
When the seedlings have sprouted and have their first set of ‘true leaves’ (which is generally the second set of leaves) they will need to be fed. Otherwise, they tend to just stay at this small size and they generally won’t grow anymore. We like to use diluted worm juice from our worm farm. If you don’t have access to a worm farm you can also use a liquid fertiliser such as Seasol. - Harden the seedlings
The more direct sunlight the seedlings can get while growing the better, but you need to make sure they don’t get overwhelmed if they haven’t seen much sun before. Hardening the seedlings means getting them accustomed to the sun. Gradually increase their exposure slightly each day until they can withstand the full sun. Or even better, give them full sun from the beginning, and then you won’t need to harden them later. Make sure you continue to water the seedlings but don’t overdo it either. Too much water will produce weak roots and fragile seedlings. - Transplanting
The final step is transplanting your seedlings to either a well-prepared garden bed or a bigger pot. Don’t forget to gently water the seedling once it has been placed into the ground or pot to allow its roots to soak into the soil.
When direct sowing seeds, follow these steps:
This method is actually a lot easier and in Michelle’s experience, the seedlings grow into strong plants as they are accustomed to the soil and sunlight right from the beginning.
- Prepare the garden bed
Prepare an area of your garden by pulling back any mulch and pulling out any weeds or old plants. A sunny spot is generally best as most flowers, herbs and vegetables prefer lots of sun. Till the soil a little so you have a nice base to bury the seeds into. We recommend mixing through some fresh compost to give the seedlings a good start. - Sow the seeds
Place the seeds into the soil twice as deep as the seed is wide. I’d plant one seed at 10cm intervals, but you can also just scatter some seed and cover it with soil. Lettuce seed for example does well with just a sprinkle and a cover. Sunflower or Watermelon seeds would do better if buried. You can put some mulch down and leave a little ‘nest’ space where the seed has been planted. This will help to keep the soil moist and will also clearly mark out where you’ve planted the seed. - Water in the seeds
Water the bed and try to keep it fairly moist over the next week. In my experience, watering it once or twice a day will do the trick until the seeds have germinated. - Thin the seedlings out
It’s very easy to end up with seemingly hundreds of little seedlings especially if you have done a ‘scatter and cover’ approach. Pulling out the precious little seedling babies feels mean but you’ll end up with stronger plants if you thin them out and give each seedling space to get the nutrients it needs. - Watch them grow
Once they’ve got a few sets of leaves I tend to back off on watering them as the plant will be weak and will be reliant on getting lots of water if you keep watering too much. Hopefully, the rain will do this job for you too.
These tips are just an overview of what Sow ‘n Sow has learned over years of trial and error. The best way for you to learn is to just give it a go!
Shop Sow ‘n Sow’s Seeds
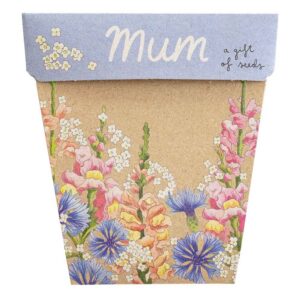
Sow ‘n Sow’s Gift of Seeds collection is perfect for friends, gardeners, colleagues, teachers and nature enthusiasts. These seed gifts contain a separate packet of seeds inside a beautifully designed, eco-friendly greeting card. Delight and inspire with different flower, herb and Australian native varieties. Made in Australia, these seed packets are the perfect gift for any occasion.